E-commerce Search Demo
AI Assisted Filters
Parameters
Query:
Category filters: All
AI Assist: ON
Page: 1
Products
Time taken: 2 Max score: 1000.000 Total hits: 100 Full time: 0.0 s
Showing 1-10 of 100 products
 B077M4VP65 Price: $2.99 Score: 1000.000 Category: Care Rating: 2.5 Votes: 3 Find similar productsHoliday Christmas - Christmas 822X Snoopy #8 Doghouse Xmas Lights Nail Decals - WaterSlide Nail Art Decals - Highest Quality! Made in USA. DIY nail art accessories - Fun and Fashionable waterslide transfer decals, creating the ultimate nail fashion for all OCCASIONS! Many styles to choose from! Made in USA! Fast Shipping Salon quality - 100% Satisfaction Guaranteed Easy to use, Instruction: 1. Paint nails with a White, or any Light Color of your choice 2. Cut as close as possible around your desired image. 3. Soak it in warm water for 15-20 seconds and then the white paper backing will slide right off. 4. Place it on your nail FACE DOWN then pat dry with cloth or paper towel. 5. Apply a minimum of 2 quality top coats to seal and protect. 6. Re-apply top coat every couple of days to help reassure the long lasting appearance of the decals. Enjoy!!!. |  B007TR0YR6 Availability: Currently unavailable Score: 9.346 Category: Care Rating: 5 Votes: 1 Find similar productsGGSELL Deco Nail art nail decals Christmas nail premium transfer nail stickers Christmas gift Santa. F.D.A, EN71, ASTM or CE approval. Non-toxic Fashionable, eye catching designs. Save money & time going to nail salon. It is nail art water decal sticker, water transfer sticker, style stripe, instruction at the package, picture of actual object, easy to use. It's certified by CE, non-toxic to humans.. Preparation tools: scissors, small water storage containers, paper towels, toothpicks or tweezers. 1. Trim, clean, and polish the fingernails, paint the background color if you like and dry it out . 2. Remove the film of the product, cut out the desired pattern and dip it into water for 10-20 seconds. 3. Moisten the fingernail, gently put the sticker to the nail surface, let it smooth and glossy. 4. Use soft towel to absorb excess water and blow dry if necessary. 5. Apply a topcoat or clear polish. |
 B0795F7RLK Price: $2.99 Score: 8.547 Category: Care Rating: 5 Votes: 1 Find similar productsHoliday Valentines Day - Happy Valentines #7603 Red Double Heart Rose Heart Love WaterSlide Nail Decals - Salon Quality! DIY Manicure Nail Art Accessories. DIY nail art accessories - Fun and Fashionable waterslide transfer decals, creating the ultimate nail fashion for all OCCASIONS! Many styles to choose from! Made in USA! Fast Shipping Salon quality - 100% Satisfaction Guaranteed NOTE:Decals are printed on Clear transfer Film, so any WHITE color in image will come out clear when applied to the nail. Use WHITE POLISH on nails to have the image show white. Easy to use, Instruction: 1. Paint nails with a White, or any Light Color of your choice 2. Cut as close as possible around your desired image. 3. Soak it in warm water for 15-20 seconds and then the white paper backing will slide right off. 4. Place it on your nail FACE DOWN then pat dry with cloth or paper towel. 5. Apply a minimum of 2 quality top coats to seal and protect. 6. Re-apply top coat every couple of days to help reassure the long lasting appearance of the decals. Enjoy!!!. |  B076C7216Q Price: $2.75 Score: 8.403 Category: Care Rating: 4.3 Votes: 7 Find similar productsWhats Up Nails - P004 Owl Love, Blue Water Decals Sliders for Nail Art Design. How To Use Remove protective transparent sticker and cut a design piece close to the shape of the image using scissors. If you are going to use the design to cover an entire nail try and cut it similar in size and shape to your nail. Remove protective transparent sticker and cut a design piece close to the shape of the image using scissors. If you are going to use the design to cover an entire nail try and cut it similar in size and shape to your nail. Place the cut piece in water or on top of a water soaked cotton pad and leave for 15-20 seconds. Place the cut piece in water or on top of a water soaked cotton pad and leave for 15-20 seconds. Remove the piece from the water and slide the image from the backing sheet with your finger using minimal pressure. If the decal doesn't slide, place it back in water longer and repeat the slide. Remove the piece from the water and slide the image from the backing sheet with your finger using minimal pressure. If the decal doesn't slide, place it back in water longer and repeat the slide. Place the decal in desired location with your fingers or tweezers. Using your fingers or a blunt object, flatten decal to the nail. Use a finger nail or wood stick to press the decal near skin. To make your design look brighter apply on light colored nail polishes. Place the decal in desired location with your fingers or tweezers. Using your fingers or a blunt object, flatten decal to the nail. Use a finger nail or wood stick to press the decal near skin. To make your design look brighter apply on light colored nail polishes. If decal is bigger than your nail, remove excess using scissors or a flat brush dipped in acetone. To remove excess from the tip of the nail you can use a nail file. If decal is bigger than your nail, remove excess using scissors or a flat brush dipped in acetone. To remove excess from the tip of the nail you can use a nail file. Wait until the decal is dry before applying top coat to seal it to the nail. If the decal covers the entire nail do not forget to seal the edge of your nail tips with top coat to completely seal the design. Wait until the decal is dry before applying top coat to seal it to the nail. If the decal covers the entire nail do not forget to seal the edge of your nail tips with top coat to completely seal the design. |
 B01ILQVW9M Price: $2.99 Score: 8.197 Category: Care Rating: 3.8 Votes: 4 Find similar productsDog Breed - Pug #1 I Love my Pug Nail Decals - WaterSlide Nail Art Decals - Highest Quality! Made in USA. DIY nail art accessories - Fun and Fashionable waterslide transfer decals, creating the ultimate nail fashion for all OCCASIONS! Many styles to choose from! Made in USA! Fast Shipping Salon quality - 100% Satisfaction Guaranteed Easy to use, Instruction: 1. Paint nails with a White, or any Light Color of your choice 2. Cut as close as possible around your desired image. 3. Soak it in warm water for 15-20 seconds and then the white paper backing will slide right off. 4. Place it on your nail face up then pat dry with cloth or paper towel. 5. Apply a minimum of 2 quality top coats to seal and protect. 6. Re-apply top coat every couple of days to help reassure the long lasting appearance of the decals. Enjoy!!!. |  B0BNWFN8NH Price: $4.79 Score: 7.937 Category: Care Rating: 5 Votes: 3 Find similar productsCharlie Brown Snoopy Peanuts St. Patrick's Day Waterslide Nail Art Decals - Salon Quality!. Are you a fan of Charlie Brown , Snoopy, Woodstock, and all of their friends ? Then these St Patty themed salon quality nail art decals are perfect for you! Multiple sizes included on 5.5 x 3 sheet. 4 Easy Steps for Application: 1) Cut the decal to fit the nail(s). They can be used on natural or artificial nails. For natural nails, apply a base coat first. For acrylic nails, a base coat is not necessary. 2) Place your decal in a bowl of warm water. It will curl up and then straighten out again. Once they are laying flat again, they are ready to slide off the paper backing and onto your nail. NOTE: THESE ARE PRINTED ON A CLEAR FILM SO THERE IS NO WHITE INK. For best results apply to a white or light colored nail. 3) Place the decal straight onto the nail in desired position. 4) Dab dry with a tissue & finish with a layer of clear acrylic or top coat to seal. These decals are slightly thicker than others because we hand coat them, meaning they are very durable. They won't curl or rip during application. The color won't bleed as you soak them. They are also easier to manuever around your nail. 100% satisfaction is guaranteed. |
 B07GNZSLW5 Price: $3.99 Score: 7.752 Category: Care Rating: 2 Votes: 2 Find similar productsI Love (Heart) Poodles Waterslide Nail Art Decals. You will receive instructions with your purchase. Just about 20 Min. you will have Beautiful Nails. These are water-slide decals, so you just trim them, soak them in water to separate the decal from the backing paper, slide them onto your nail and then position them, then add a clear topcoat. They work best with white or lighter polish. | 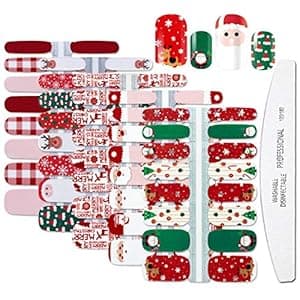 B08LKB19RK Price: $5.99 Score: 7.692 Category: Care Rating: 4.1 Votes: 18 Find similar productsWOKOTO 5 Sheets Christmas Adhesive Nail Polish Decals Strips With 1Pc Nail File Snowflake Nail Art Wraps Stickers Manicure Kit For Women. PACKAGE CONTENTS: - 5 sheets nail polish decals - 1 pc moon shape nail file FEATURE: - 100% Brand New and High Quality - Say goodbye to the mess of liquid nail polish. - No drying time - Easy applicationfinger stickers - Long-lasting HOW TO USE : 1) Apply the base coat and wait for drying. 2) Take out your favorite pattern with your hands. *Notice:DO NOT TOUCH THE BACK SIDE OF NAIL Decals TO AVOID THE OIL OF SKIN AND LEAVE A BIT SPACE BETWEEN NAILS WITH CUTICLE 3) Stick on your nails and press gently. 4) Apply the polish in the nails (Cover the nails completely) and wait for drying. 5) Done! WARM NOTE: Do Not Apply On Cuticle And Skins. Leave A Bit Space Between Nails with Cuticle, So The Stickers Can Keep For Longer. |
 B0BGBP33S8 Price: $5.99 Score: 7.576 Category: Care Rating: 3.5 Votes: 5 Find similar productsChristmas Nail Art Stickers Snowflakes Nail Decals White Snowflake Elk Design Nail Stickers 3D Self-Adhesive Winter Nail Art Supplies Snowflake Nail Charm for Women Xmas DIY Acrylic Nails 6 Sheets. Quantity: 6 Sheets Christmas Snowflake Nail Stickers Size: 3.7 in*2.5 in Pattern: Christmas Snowflake Series Nail Design Features: 1.Easy to stick on natural or artificial nails. 2.Suitable for professional nail salons or home use. 3.Easy to disassemble, the pattern can be changed at any time. 4.Suitable for nail polish, gel polish, artificial acrylic nails, etc. 5.To DIY their own nail styles according to their preferences. How To Use: 1. Use your favorite nail polish as a base color and dry it completely. 2. Please select the appropriate size and pattern, compare with your own nails, and choose the appropriate pattern. 3. Use the sticker tweezers to remove the sticker, and then press it with the embossing stick to make the sticker evenly attached to the nail surface. 4. Apply a clear top coat and wait for it to dry. 5. Different patterns can be matched with different clothing and nail styles to show personal charm and create different styles. |  B0BLMP338Q Price: $7.97 Score: 7.463 Category: Care Rating: 4.6 Votes: 3 Find similar productsChristmas Snowflake Nail Stickers, 5D Embossed Snowflake Christmas Nail Decals 3D White Snowflakes Nail Art Stickers Christmas Glitter Snowflake Stickers for Nails Winter Xmas Nail Supplies,8 Sheets. Pattern Making Techniques 1. Ordinary Printing Snowflake (3D nail stickers, flat and smooth to the touch? 2. Glitter Powder Foaming Snowflakes(5D nail sticker, stereoscopic embossed effect? Specification Quantity: 8 Sheets/Set Material: Sticker Color: White Item: Christmas Snowflake Nail Stickers Type: Nail Stickers/Decals Sticker size: 12.2x7.5cm/4.80x2.95inch Pattern: Snowflakes, Snow Dots, Hearts, Antlers, Stars, Starlight Main Purpose: Used for DIY nail art, can be used with nail polish Package Content: 8 Sheets Christmas Snowflake Nail Stickers (4 Sheets 3D Snowflake Nail Stickers+4 Sheets 5D Embossed Nail Stickers) Feature: Various snowflake pattern in different shape and size for choose. Self-adhesive nail decals, no need nail glue to stick, easy to use. Xmas snowflakes nail stickers, make your nails more shiny and charming. Christmas nail art stickers for Christmas and winter nail art design. Ultra-thin nail stickers suit for natural nails and artificial nails. Suitable for home use or professional nail salon use. How to Use: Step 1. Clean the surface of the nail where the design will be placed. Step 2.Applying a thin layer of base coat and wait it dry completely. Step 3. Select a colored polish that your like and apply it onto your nails, then wait until it 90% dry. Step 4. Select a pattern design and peel it off by your nail or tweezers. (Don't touch the glue) Step 5. Place the design on nail and rub it gently several times. Step 6. Apply a layer of top coat and cure it for best lasting results. |